| T O P I C R E V I E W |
| mcrealty | This is attempts 3 & 4 for the new sub woofer box. 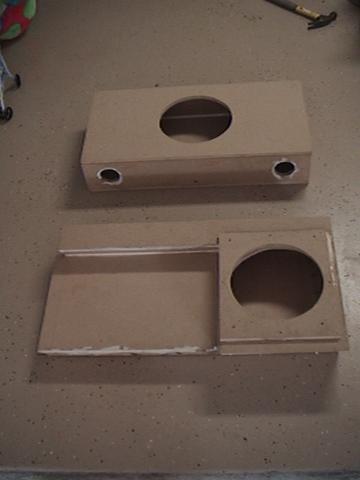
Number 3 left no room for the amp and the deck lid wouldn't close. #4 have an amp shelf but no enough air volume and the sub was touching the top carpet. I then went to this. I am still not completely happy, but it is much better then the stock. 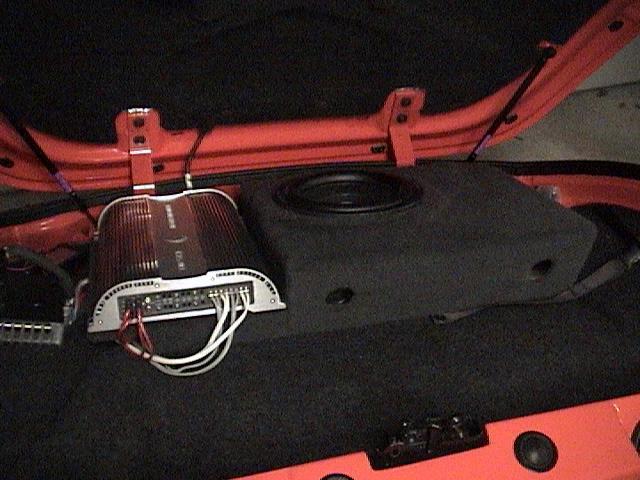
Note: The box is ported - this allows a lot of the sound to fire forward into the cab. 
The existing sub box was removed. I attempted to recreate it out of MDF, this was a nightmare. I trashed it about halfway through. Sorry, no picts - but it quite a complicated piece of work. I then made a more square copy (no picts), them attempted to make some sort of smooth cover. 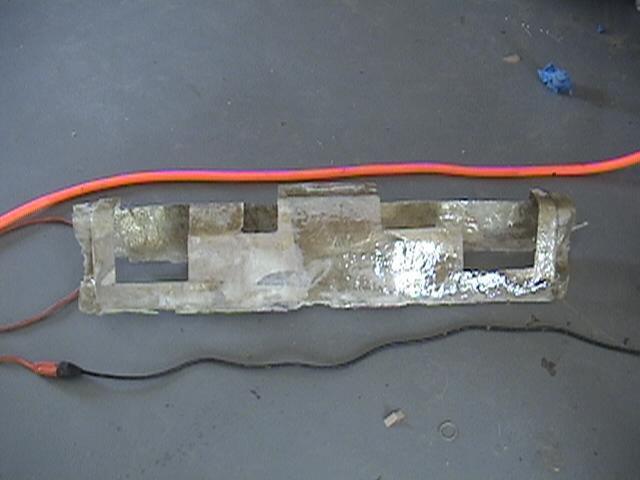
This didn't work either. I them made this box - added the piece hanging down at the last minute to go for the cascade look, as seen in the finished product. 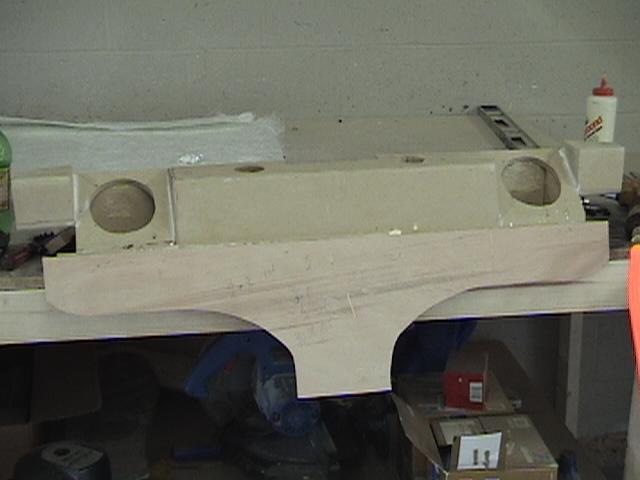
This is what it finally came out to be after hours and hours of filling, sandy, glassing, etc. 
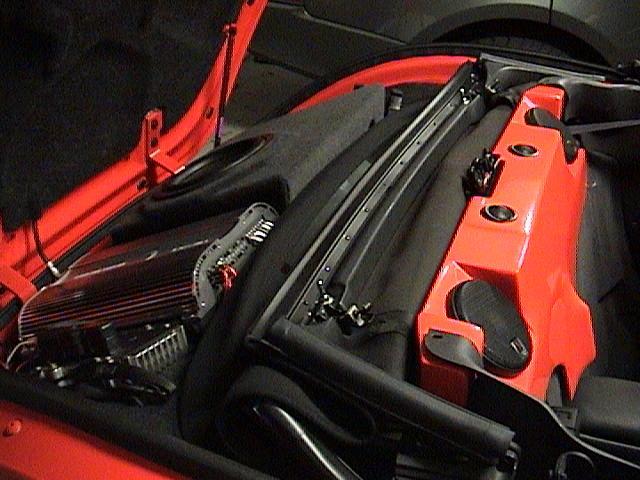
This box holds the Diamond Audio M6 Series 4 1/2's & Tweeters. In the doors I used Diamond Audio Hex Series 6 1/2's - the tweets for these went in the upper dash. |
| thedqman | Verry Nice Scott !!!
Now who said you had no talent???
Mike |
| thedqman | Verry Nice Scott !!!
Now who said you had no talent???
Mike |
| pumpkin | Real nice job. ------------------

Current mods: Mopar dual exhaust & front mudflaps; MacMotorsports Air Intake;
Real Rod Air Patrol; Graphics by Balistek Designs; ($8) Chrome grille; Chrome
tire valve-stem covers; Painted rear bumper lettering; Prowler Pro Gears; Synthetic
Oil; Raybestos Ceramic Brake Pads; TGF Door Panel Inserts & Headrest Covers;
SheepskinExpress Sheepskin Seatcovers; Grille Light; Pinstriping by Bo Boring;
Painted Valve Cover; Window Tinting; Windshield Visor Banner; Front Bumper
Removal / Relocation of Front Turn Signal Lights; Real Rod Transmission Cooler
Cover, Sill and Carper Covers, Aero Front Covers and Roadster Rear Pan, rear
bumpers removed; rear mudflaps; painted calipers; Prowler Products by Gary
Drilled Rotors, front and rear; Painted tach; Jay's Aluminum Billet Center Caps
w/shimmers, Chrome Lugnuts and Chrome Radio Bezel Shimmer; Dash Rings;
Windshield Wiper Arm Removal; Fender Trim; Speaker Replacement; Painted
Plenum; Painted Radiator Crossmember; Painted Rear Mudflaps; Air Patrol
graphics�.� More 'Pumpkin' photos . . . . . More cars and other stuff New pictures in Personal Scrapbook (02/23/03)
"I may have to grow older, but I do not have to grow up!" "The Prowler is not a car to go from Point A to Point B. The Prowler is the Point!" |
| mcrealty | I tried to show & tell in the posting how everything came to be. The box for behind the seats was created with MDF (1/2" particle board) then glassed over.
As for the sub, I am losing a bit of bass with the sub firing directly into the deck but the forward firing ports help a lot. I am currently waiting for a newly designed 10 inch sub from Diamond Audio that is approx 1" shallower. This should allow for more air space above it. If you look a the box behind the seats and the trunk catch you will see this box is about 2" shorter in height than the OEM (it is level with the release lever). This allows for the sound from the sub to flow forward into the cab.
If you have any suggestions for me or thoughts please let me know. The only other problem I have with this design is I no longer have any truck space to speak of. ----- Original Message -----
Scott, how are you doing, this is Pumpkin from the POA.
Let me first say you did a fine job on the stereo system mods. We just put in all new speakers and almost put in a sub-woofer in the trunk. I know the sub is non-directional but with being in the trunk don't you lose a lot of the base. I can see a lot of good sound with the top up but with the top down the top blocks a lot of sound or am I all wrong??
The sub box you made was real nice. I wonder do you give out any secrets how you made it. Material, how did you get the basic mold made. I would build my existing sub-roofer in the new sub box.
|
| pumpkin | Thanks for the info, spring job here we go. |
| whealy | Looks great Scott! |
| Gary Archer | Nice job Scott! I'll bet it sounds great! ------------------
Gary Archer
02 Gold |
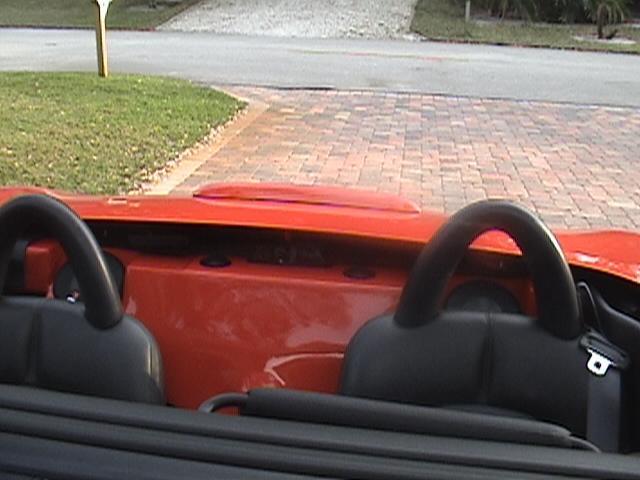
| pumpkin | Scott, at your leisure would you post a picture with the trunk lid closed and top down, would like to see how that appears since you have a lower cover. Thanks in advance,
Norm and Pat |
| mcrealty | Here are a couple of shots as per your request. 

|
| GenoTex | That looks Very Nice! Great work! |
| Laddie Roussel | Looks great Scott. ------------------
 |
| Marty Usher | It looks great Scott. I bet it sounds terrific, also! ------------------
 2000 Black with hand painted blue faded to purple flames 2000 Black with hand painted blue faded to purple flames
 |
| jammer | Hi Scott, are you making these to sell????????????, I would love one in yellow. regards Doug |
| mcrealty | The amount of work required to reproduce this would not make it cost effective. This box also does not house a sub, therefore it would require everyone to basically do the same installation I have. |
| SunriseCruiser | I am doing a similar project and i cant figure out how to get the bump in the middle like you can you tell me how you made yours? Thanks. |
| mcrealty | I used a simple graphics program to create on side of the slop. It has a simple curve to it - I drew a straight line at a 45 degree angle, then grabbed it in the middle and pulled it inward until I reached the desired curvature). Once you have on half of the hump, print it out and fold the paper in half at the apex of hump. Then I cut it out - wallah you have two equal sides. I used three cut out on my car. The center is slightly larger than the top and bottom. When printing you may have then option for scaling the item smaller or bigger. This is what I did until I came up to the sizes I wanted. I them traced them onto 3/4 mdf and cut them out. Then mounted them on a 1/4 piece that hangs down below the box I built. The piece was then finish off by stretching matting, used in fiber glass work, over the entire unit and stapling it down.
I hope this helps, if I can be of any assistance post or call my cell 772-532-4815
|

